Simulate a STM32 project
This section is a tutorial that guides you through the use of Zazu and shows you the steps you need to take to launch your first simulation of “blinky” application for the STM32WBA55CG board using STM32 VS Code Extension.
Create your application for the STM32WBA55CG
The following link provides a tutorial to guide you through creating your project using STM32 VS Code Extension : link
Configure the simulator
-
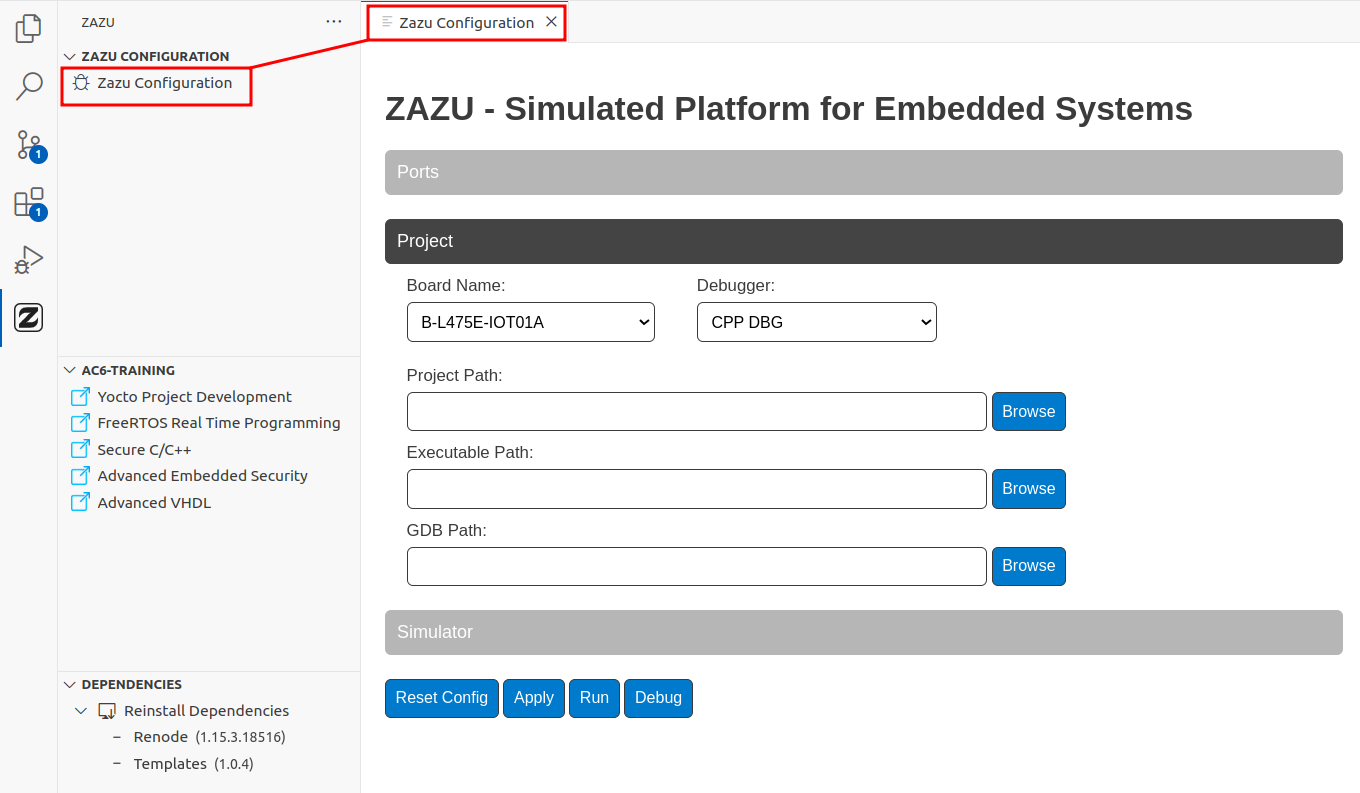
Click on "Zazu Configuration" to open the Zazu Configuration view
-
The View Configuration consists of three sections:
- Ports: Allows configuration of the generator's ports, primarily for advanced use.
- Projects: Contains the necessary information for the simulator to interact with your project.
- Simulator: Includes simulator-specific configurations, useful for advanced scenarios.
-
We will configure the Projects section using the blinky example created in the first step.
-
Select the STM32WBA55CG board and keep the default debugger.
If you have installed STM32 VS Code Extension and configured it, the "GDB Path" will be filled in automatically. Otherwise, enter them manually. -
Click on the Project Path field—a dropdown list of projects in your workspace will appear. Select blinky.
If you have compiled your program, the "Executable Path" will be filled in automatically. Otherwise, enter them manually.
Start the simulation
When you press Run or Debug, the configurations are automatically saved. However, if you want to save your configurations without starting a simulation, simply click Apply.
- Run: Starts the simulation.
- Debug: Starts the simulation with a debugging instance.
- Click on "Debug" and start the debug
